Dimmer ModuleUpdated 3 months ago
Description:
The Dimmer Module extends the functionality of your Gen2 iotty Smart Switch Controller by adding a dimmer function. There is no need to modify the wiring, simply follow the directions below or in the Dimmer Module User Manual (located in each Dimmer Module product box). Once you have done all the operations as described you’ll be able to control the brightness of your lights by sliding your finger on the glass faceplate along the vertical bar or from your smartphone via the iotty app.
ATTENTION: the maximum load that can be connected to the device in dimmer mode is lower than in switch mode. Please refer to the specifications on usable loads in this guide under “Max Output:”.
Safety:
- Install in accordance with all national and local codes
- Hire a professional electrician if you are not familiar or not comfortable with electrical work, or if the wiring in your electrical box looks different from the pictures
- For indoor use and dry location only
Dimming Compatibility:
The IOTTY Dimmer Module is designed for use with forward-phase (leading-edge) dimming systems, commonly known as TRIAC dimmers. It is not compatible with reverse-phase (trailing-edge) dimming systems, such as ELV (Electronic Low Voltage) dimmers.
Installation Requirement:
- Requires an iotty Smart Switch Controller
Technical Specifications of the Dimmer Module:
Input 110 Vac
Frequency 60Hz
Max output: 350W, INC 150W, LED 150W CFL
Ambient temperature: 77°F | 25°C
Operating temperature: 32°F to 104°F | 0°C to 40°C
Pollution Degree: 2
Rated Impulse Voltage: 2.5kV
Overcurrent protective device external: 15A circuit breaker
Dimmer Module contents:
- Contains 1 Dimmer Module for use of a single gang of a Gen2 iotty Smart Switch Controller to enable dimming
Instructions:
Step 1) Turn power OFF at the Circuit breaker for the switch you are replacing

Step 2) Follow the Installation Guides here for the Switch Controller model you are installing, after Step 3 of the Switch Controller Install Guide follow *Step 4* of this guide below
Step 3) If already installed, Remove the glass Faceplate and unscrew the iotty Smart Switch Controller
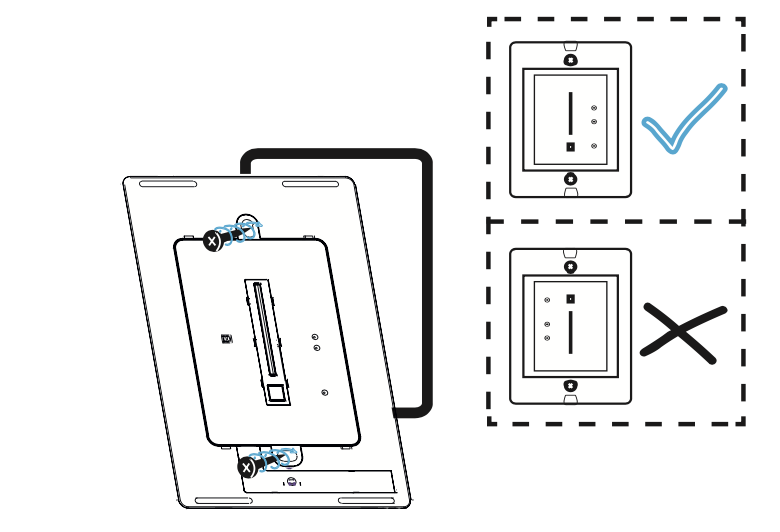
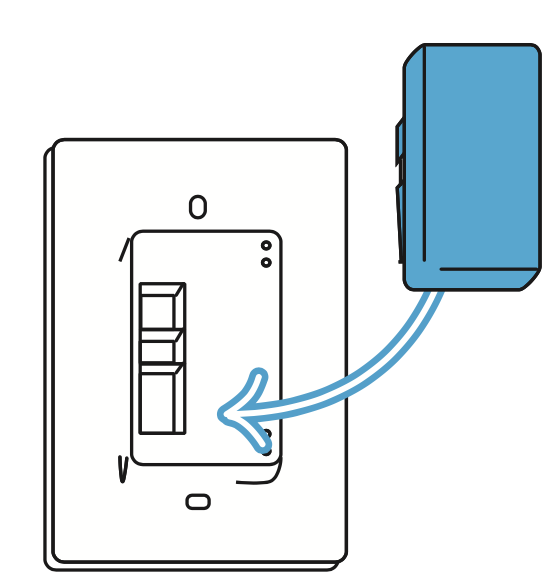
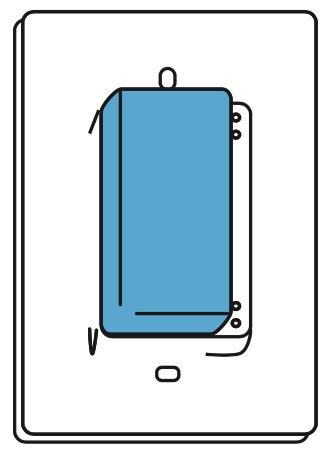
*Step 4) Turn the Switch Controller to see the back, don’t touch the wiring, attach the iotty Dimmer Module to the back of the Switch Controller for the side of the Switch(es) you would like dimming enabled
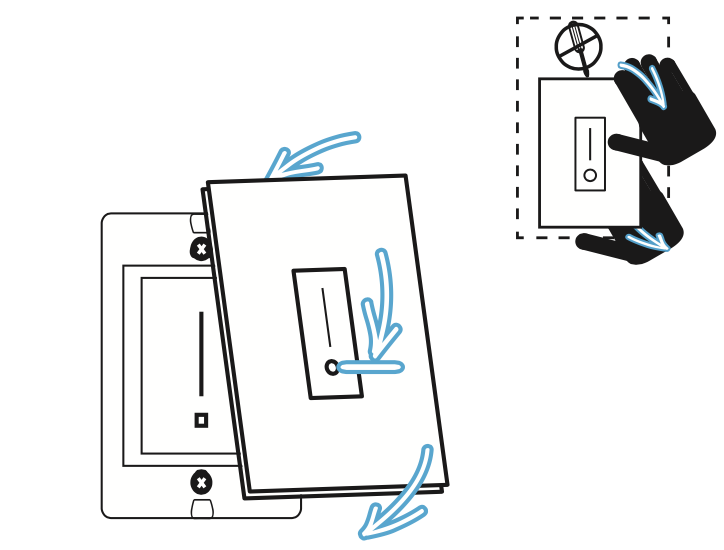
Step 5) Remove the black protective film covering the dimming indicator on the front of the device to see the touch slider on the glass
Step 6) Screw the iotty Switch Controller back into position, reinstall the glass Faceplate and turn ON the power at the circuit breaker